Execute WinCvs13b4.zip, extracting WinCvs13b4 to the same directory.
Change directory to WinCvs13b4.
Execute SETUP.EXE (using all default choices).
and place the executables in
C:\Program Files\Putty
puttygen.
- Press the Generate button and
follow instructions.

- Type in a passphrase and press the Save private
key button and provide the file name
identity
- Press the Save public key
button and provide file name
identity.pub
pscp identity.pub your-user-name@shine.cise.ufl.edu:identity.pubType your password.
Execute plink -ssh you-user-name@shine.cise.ufl.edu
Type your password.
Execute TERM=tty (alternatively execute set term=tty).
Execute cat identity.pub >> .ssh/authorized_keys
Execute rm identity.pub
Type ^-D (control-D) or type logout
to exit plink.

The WinCVS Preferences dialog box will appear at program start.
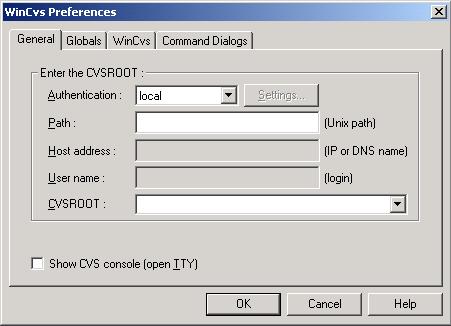
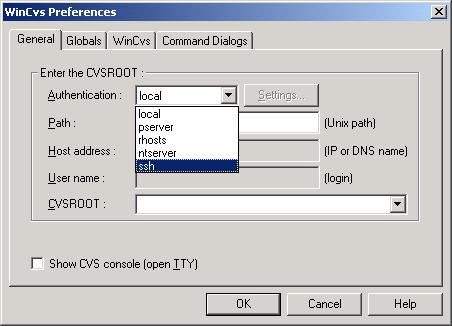
Set Authentication to ssh.
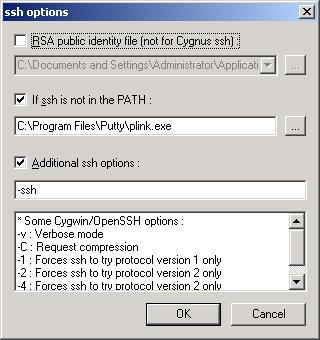
Click the Settings button.
Make sure "If ssh is not in the PATH" is selected.
Type the path to plink.exe in the box below that checkbox. (
C:\Program Files\Putty\plink.exe).Select the "Additional ssh options" box.
Type -ssh in that box.
Click OK.
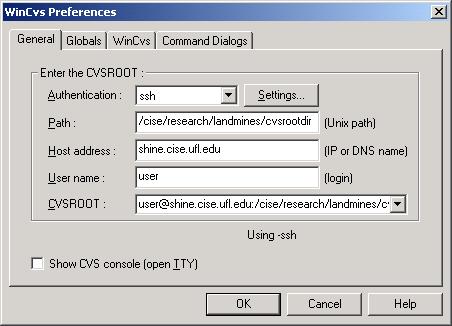
Edit the Path text field to contain the path to the CVS Root directory on the CVS host (
/cise/research/landmines/cvsrootdir.Edit the Host field to contain the fully qualified host name of the CVS host (
shine.cise.ufl.edu).Edit the user name to contain your user name on the CVS host. The CVSROOT field will be automatically updated with this information.
pageant.Select the
pageant icon in the Tool tray on the
lower right hand corner of your screen.Click the Add Key button.
Browse to select the
identity key file you created
with puttygen.Type your passphrase.
As long as pagenat remains running, you will be able to connect to the remote host (shine.cise.ufl.edu) by running
plink withouttyping a password. This is both a convenience and a security risk. Stop pageant if your login session will become unguarded.